Placemark layers
Adding layers helps to distinguish different routes and photo placemarks from each other.
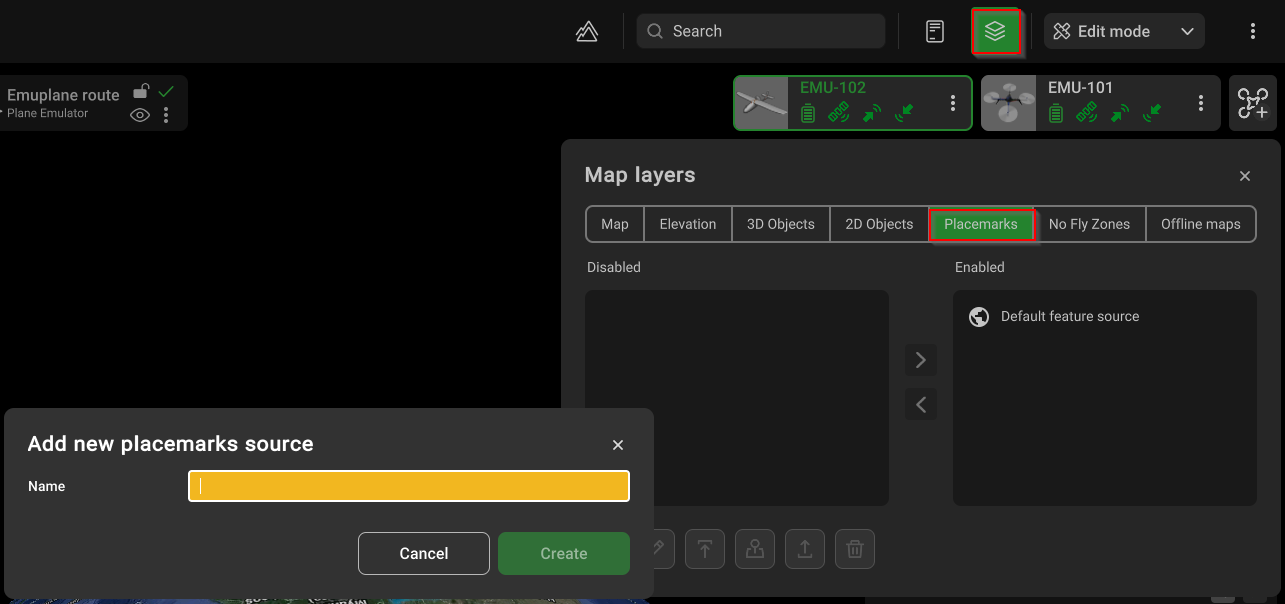
- Click the Map options (globe icon at the top right-hand corner of the screen);
- Click the Map layers button;
- Select Placemarks;
- Click “Add” on the bottom left corner and provide a friendly name for the layer on which all the desired placemarks should appear;
- Move the newly created layer to the “enabled” section of the screen by selecting it and clicking the right-pointing arrow in the middle. The layer with the provided name should now appear in the “Placemark settings” section in UgCS for the DJI options menu.

In case of using more than one layer, select the layer in UgCS for DJI to assign placemarks to.
To export all the placemarks at once as .JPG or.KMZ files, click the Map options (globe icon at the top right-hand corner of the screen) and click the Map layers button, select Placemarks. Select the layer, in which placemarks were assigned. All the placemarks on the map will turn green. Select “Export placemark images” – to export as *.JPG files with coordinates or “Export Placemarks as KMZ” to export as Keyhole Markup language Zipped file.
To import the placemarks to the desired layer, click Upload and browse for previously exported data.
Updated 3 months ago
