How to import DEM data into UgCS
DEM data import DEM stands for Digital Elevation Models. The terrain is always changing. These changes are not always implemented into 3D maps as fast as it is needed. An example would be a quarry. If the operator of a UAV would want to fly an automated mission for the purposes of mapping, surveying, or monitoring a quarry, he would need to import DEM data to fly below what would otherwise be considered ground level. This data would then make the drone able to fly closer to the ground in the quarry to do its mission. Another scenario is in the mountains where the operator needs to use DEM with more precise data as commonly available map providers offer less precise data than necessary to plan safe missions.
UgCS supports the import of Geotiff for elevation.
For the use of this How-to instruction, the DEM data was downloaded from https://dronemapper.com/sample_data/
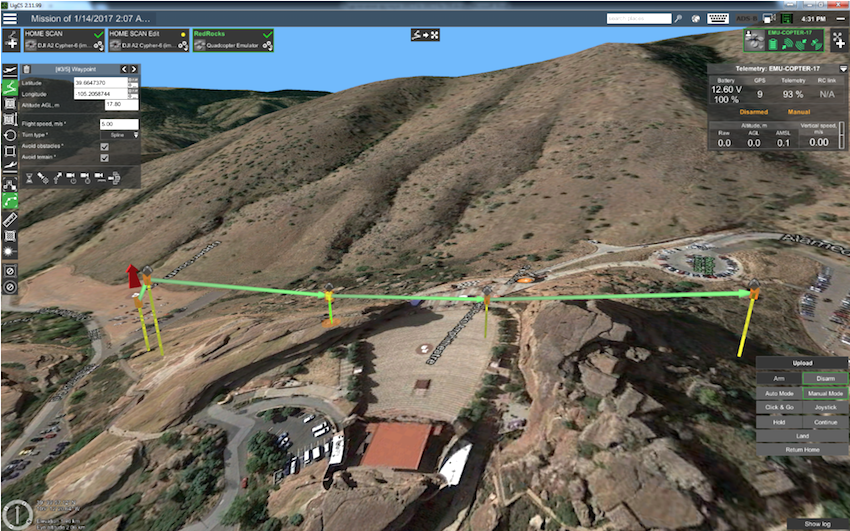
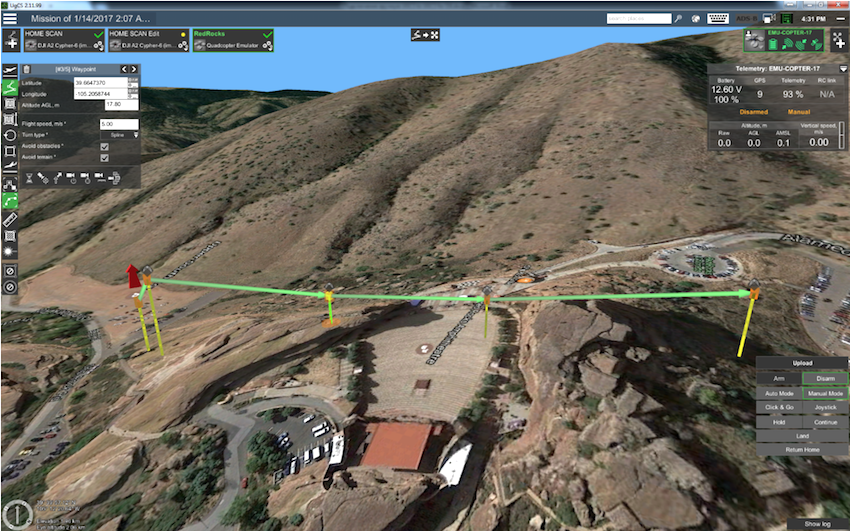
The following image shows the Red Rocks area using SRTM4 elevation data (default elevation source in UgCS) and a simple route crossing the two mountains:
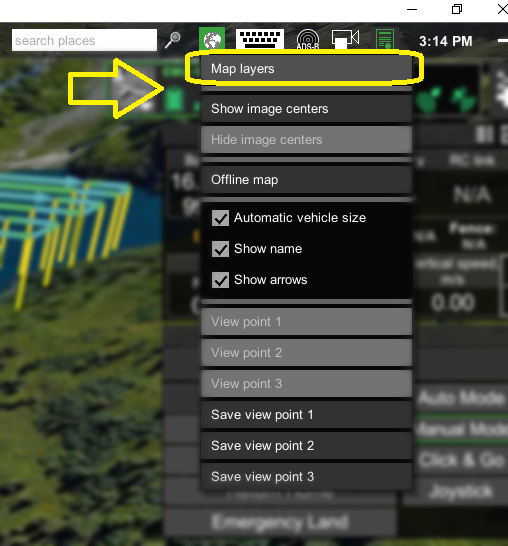
In order to improve the terrain accuracy of the area, it is necessary to import precise DEM data into UgCS. First, click the globe icon on the upper right part to access Map options.

Select Map layers from the drop-down menu.
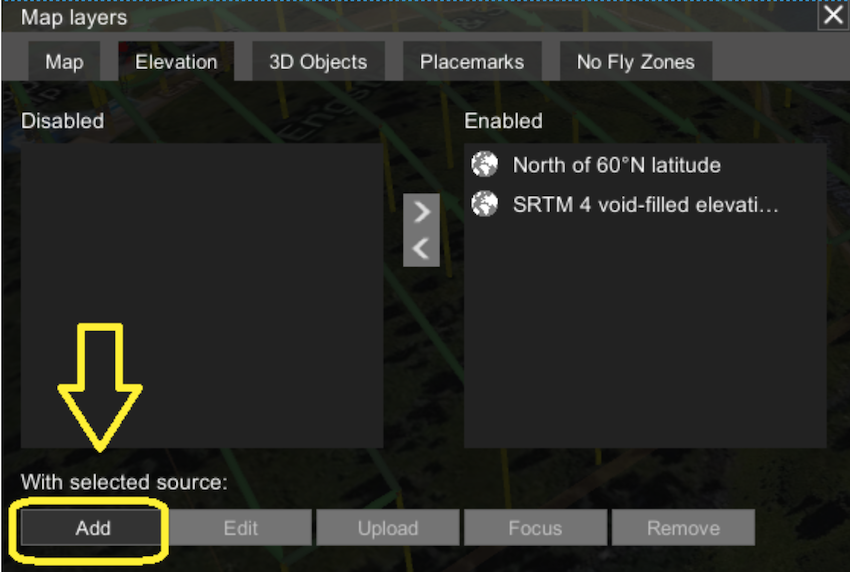
In order to store a new elevation dataset, it is necessary to create a new elevation source for it. To do that select the Elevation tab and click the Add button.
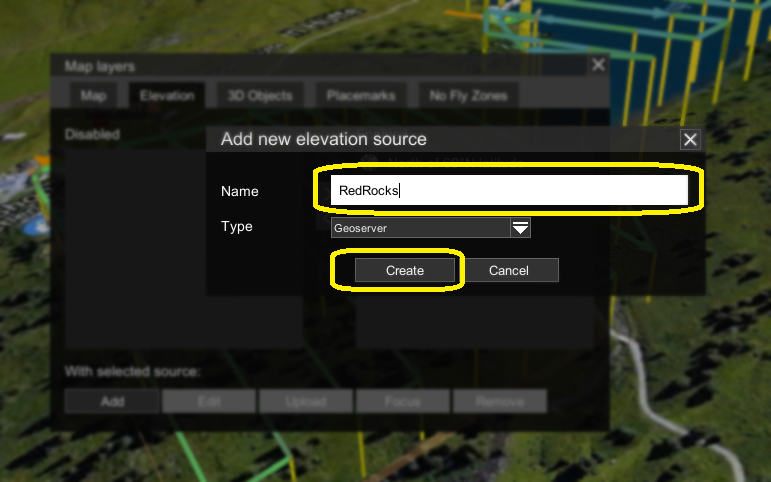
Enter a name for the elevation source and confirm with the Create button.
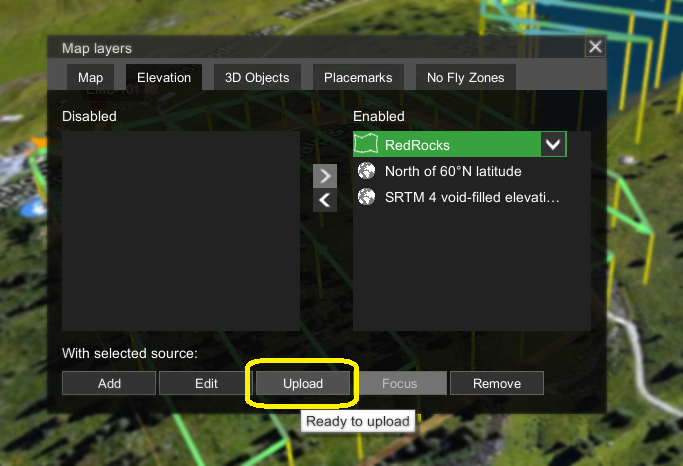
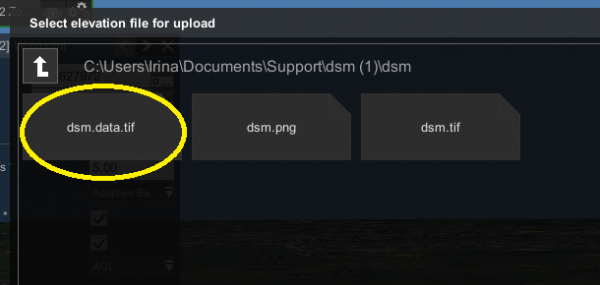
The newly created elevation source will be displayed in the right column of the window – Enabled sources. Click Upload to upload a specific elevation (DEM) file into the new elevation source.
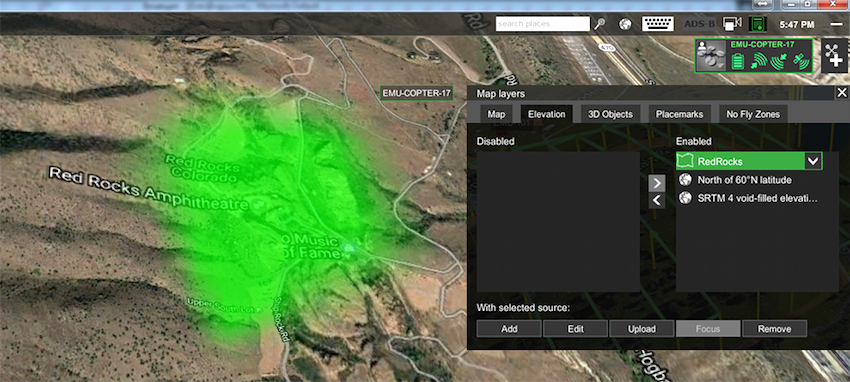
To center the view of the map to the location of the imported DEM, in the Elevation tab of the Map layer window select the source and click Focus. The Terrain data of a certain source will be highlighted in green.
DEM data import is complete!
The DEM data imported into UgCS can be used without an internet connection (offline).
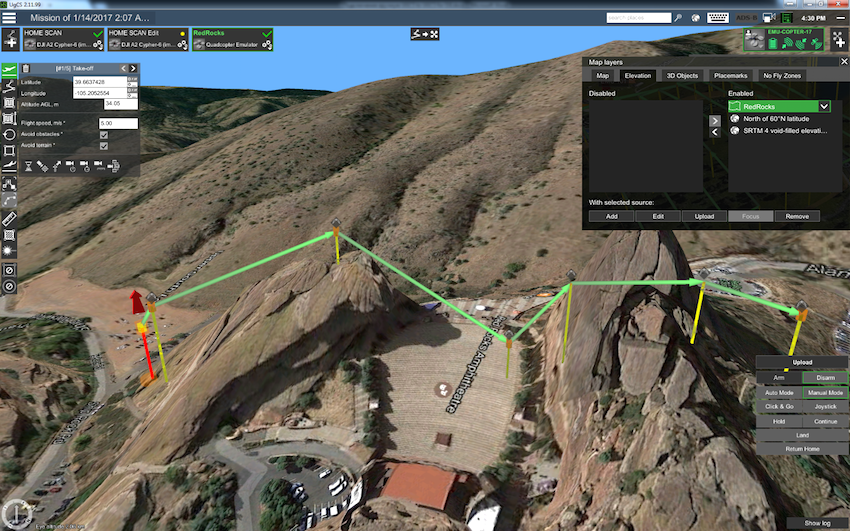
In the image below the location is displayed taking into account the imported DEM data and the route is being recalculated taking into account the elevation data.
For comparison – the same location before the import of DEM data
Note: When using GeoTIFF from a PIX4D source, must select the data.tif file format.
Updated 3 months ago
